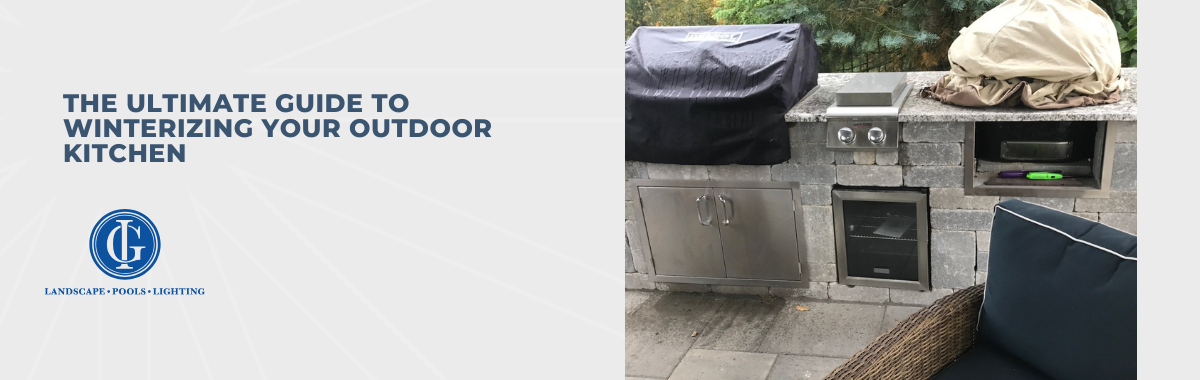
The Ultimate Guide to Winterizing Your Outdoor Kitchen
As someone who loves firing up the grill and whipping up meals outdoors, I get it—there's nothing like cooking under an open sky. But when winter rolls in, your outdoor kitchen needs a little extra care. Ignoring this can lead to cracked pipes and rusted appliances—and likely some unexpected costly repairs come spring. Trust me, I've learned this the hard way.
Proper winterization truly extends the lifespan of your appliances, saving you money on repairs and keeping your outdoor oasis ready to go when the weather warms up. If you want to keep your outdoor kitchen in top shape, here are my top tips:
- The best outdoor kitchen for winter weather
- Why winterizing your outdoor kitchen is important
- Step-by-step guide to winterizing your outdoor kitchen
- Extra tips for outdoor kitchen winter maintenance
- When to start winterizing your outdoor kitchen
- Preparing for your outdoor kitchen spring reopening
Keep reading to learn exactly how to winterize your outdoor kitchen and make sure it sees it through winter’s cold and ice in pristine condition.
The Best Outdoor Kitchen for Winter Weather
If you're lucky enough to be designing an outdoor kitchen from scratch, choosing the right materials makes winter prep easier. Stainless steel, concrete, and granite are your best choices. They withstand cold and resist moisture very well. Bonus: these surfaces are also easy to clean. From my experience, appliances designed for outdoor use like weatherproof refrigerators and sealed grills handle winter better than their indoor counterparts.
Consider adding a covered structure like a pergola or retractable screen. It shields your kitchen from snow, ice, and harsh winds—and it also ups the aesthetics, too, in my opinion. I've seen setups where a simple overhang made all the difference in keeping countertops dry and appliances rust-free.
Why Winterizing Your Outdoor Kitchen Is Important
You might wonder, “Is it really necessary to winterize?” It definitely is. Here's why:
- Protect Appliances from Extreme Cold: Freezing temps can crack grill components and damage refrigeration lines.
- Prevent Frozen and Burst Pipes: Water left in pipes expands when frozen, causing costly bursts.
- Save Money on Repairs: A little maintenance now beats replacing appliances later.
- Ready for Spring: No need for major repairs when you could be flipping burgers instead.
Step-by-Step Guide to Winterizing Your Outdoor Kitchen
Winter’s coming, but your outdoor kitchen doesn’t have to suffer for it. Here’s how to protect it step-by-step, so it’s ready to fire back up when the frost melts.
- Shut Off and Drain Water Lines
Before the first freeze hits, turn off your water supply to the outdoor kitchen. Drain all pipes, faucets, and sinks. I use an air compressor to blow out any lingering water—it’s an extra step, but it saves me from surprise leaks in the spring. - How to Winterize Outdoor Kitchen Appliances
- Grill:
- Clean grates and burners thoroughly to remove grease.
- Turn off the gas supply and disconnect propane tanks.
- Cover with a weatherproof cover to prevent rust. I've found that heavy-duty covers last longer and offer better protection.
- Refrigerator & Ice Maker:
- Empty, unplug, and clean the interior to prevent mold.
- Leave doors slightly open to allow air circulation.
- Cover or move indoors if possible.
- Outdoor Sink:
- Drain and disconnect the water supply.
- In extreme temps, pour non-toxic antifreeze into the drain to prevent freezing.
- Wrap exposed pipes with insulation for extra protection.
- Pizza Oven & Smokers:
- Remove leftover ash and grease.
- Cover tightly to keep out moisture, which can cause rust and mold.
- Protecting Countertops and Cabinets
Clean and seal stone countertops like granite to prevent cracking. Wooden or metal cabinets should be covered with waterproof material. For fragile items like glassware, just bring them inside—better safe than shattered. - Covering and Storing Outdoor Furniture
Clean and dry all furniture thoroughly. Use weatherproof covers to protect from snow and ice. I always store cushions indoors to prevent mold—you’d be surprised how fast moisture can ruin them.
Extra Tips for Outdoor Kitchen Winter Maintenance
While it’s all too easy to forget about your outdoor kitchen once it’s covered (this happens to me, too), a little attention during the colder months goes a long way. Here’s what I do to care for my outdoor kitchen throughout winter:
- Perform Occasional Checks: Every few weeks, do a quick inspection. Look for signs of damage, moisture buildup, or critters seeking shelter.
- Clear Snow: Don’t let snow pile up on appliances or countertops. It adds weight and moisture, both of which can cause damage. Use a soft brush to clear snow without scratching surfaces.
- Prioritize Ventilation: If your outdoor kitchen is enclosed, crack a window or vent to prevent mold. Good airflow helps prevent condensation, which can lead to mildew and corrosion.
- Protect Power Sources: If you have electrical outlets or appliances, caulk them so they’re properly sealed against moisture. Consider using weatherproof covers for added protection.
Check Covers Regularly: Make sure any covers are securely fastened and haven’t shifted during windstorms. A loose cover can let in snow and moisture, entirely defeating its purpose.
When to Start Winterizing Your Outdoor Kitchen
Timing is everything when it comes to protecting your outdoor kitchen from winter’s chill. The best time? Before the first frost. This usually means late fall, depending on where you live. When temperatures consistently drop below 40°F, it's time to roll up your sleeves and winterize.
Preparing for Your Outdoor Kitchen Spring Reopening
Spring is when the fun begins again—grilling sessions, outdoor gatherings, and late-night dinners under the stars. Before I jump back into chef mode, here’s what I do to make sure everything goes perfectly:
- Reconnect Water Lines Carefully: Check for leaks before turning on the water supply. Run the water slowly at first to detect any pressure issues or hidden leaks.
- Inspect Appliances: Look for rust, cracks, or signs of rodent activity. Pay close attention to wiring and hoses, as small critters sometimes chew through these during colder months.
- Clean Thoroughly: Even covered appliances can collect dust or debris. Wipe down all surfaces with warm, soapy water, and sanitize food prep areas to eliminate any lingering bacteria.
- Test Electrical Connections: Make sure all outlets, lighting, and electrical appliances are functioning correctly before heavy use.
- Refresh Your Cooking Gear: Sharpen knives, clean grill grates, and check fuel supplies so you're ready to cook without interruptions.
Conclusion
You’ve taken great care to create the outdoor kitchen of your dreams—why not invest a little time into making sure it weathers the winter cold? After all, it’s the space where you make precious memories with friends and family. Take these steps seriously, and come spring, you’ll be flipping burgers and sipping drinks without a hitch. Not sure if you’re winterizing well enough? Don’t hesitate to consult a professional—sometimes, peace of mind is worth it.

QUICK LINKS
CONTACT INFO
Green Ideas
Hartville, OH
Phone
SCHEDULE A CONSULTATION
Contact us, and we will come out and discuss your project free of charge.